BiS Manager
Raid-leader guide for roster setup, Raid Helper imports, BiS Overview, loot assignment and reviews.
BiS Manager
This raid-leader guide explains how to use the MerfinUI BiS Overview and BiS List Manager workflow for rosters, raid compositions, loot assignment, reviews, and cleanup.
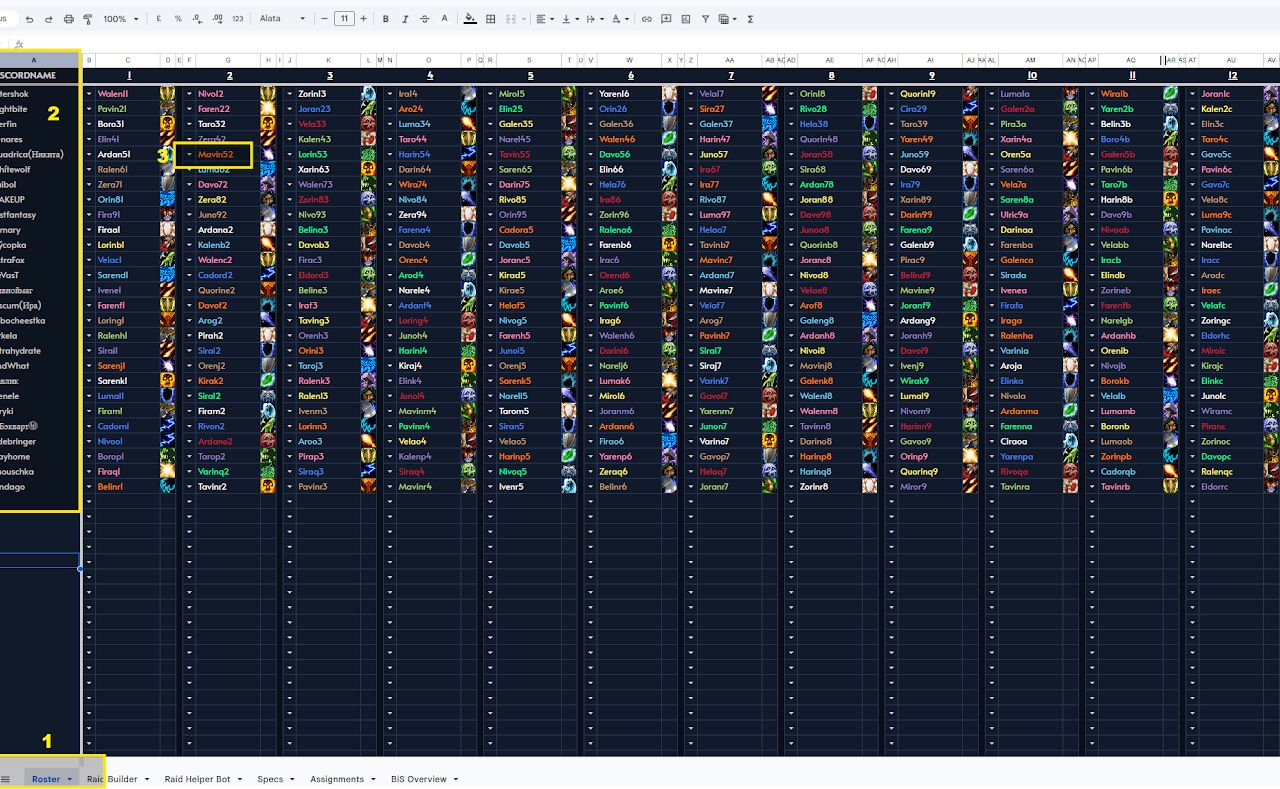
1. Activate Your Roster
The Roster tab is the core setup step. Add the exact Discord names exactly as they appear in Discord, then link every Discord name to the correct in-game character name, class, and specialization.
Use the class/spec dropdown and character name field for each player. The spec icon and class colors are applied automatically. This only has to be done once, and can later be moved to a new sheet through the All-in-One export/import flow.
2. Build Your Raids
You can build raids manually or automatically. The sheet supports up to ten raid compositions, which is useful for guilds with multiple runs.
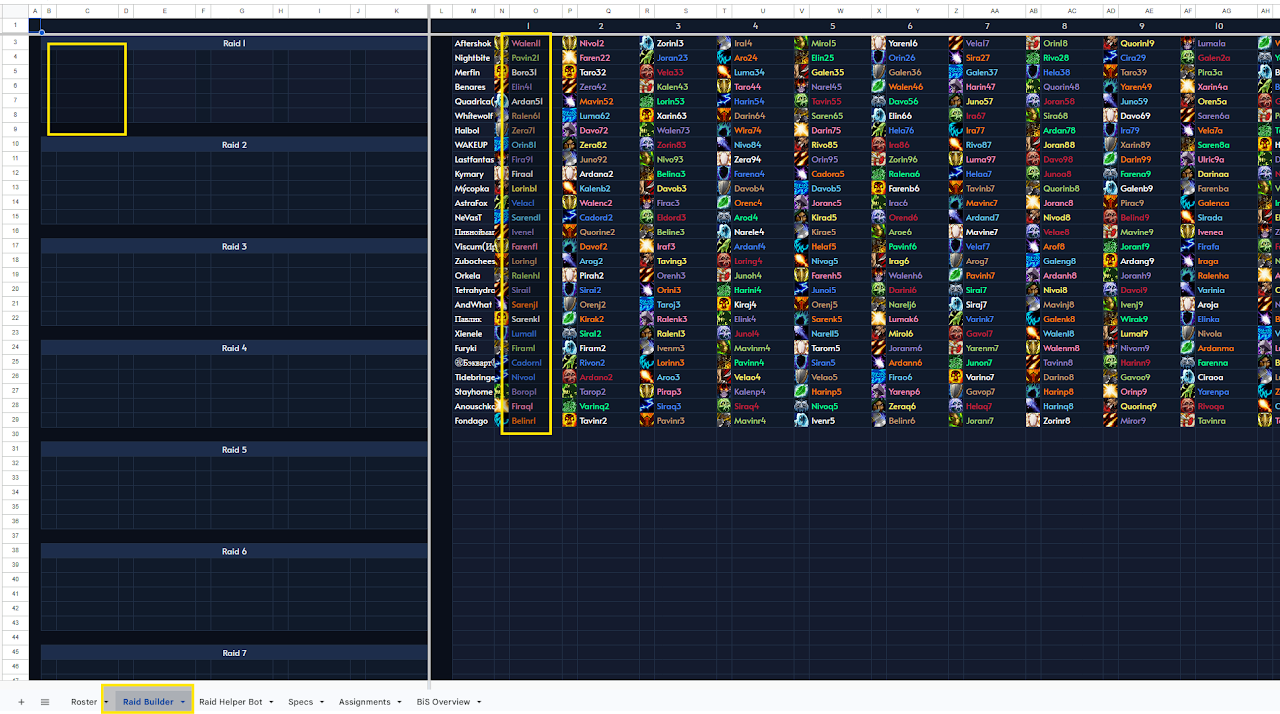
Manual Raid Building
Use the Raid Builder tab and enter the in-game names from your roster into Raid 1 through Raid 10. The player appears with the correct spec icon and disappears from the available list, helping prevent duplicates.

Automatic Raid Building with Raid Helper
To import from Raid Helper, choose Custom 1 through Custom 10 in the Raid Helper Bot tab, paste the Raid Helper export string, and click Import Roster.
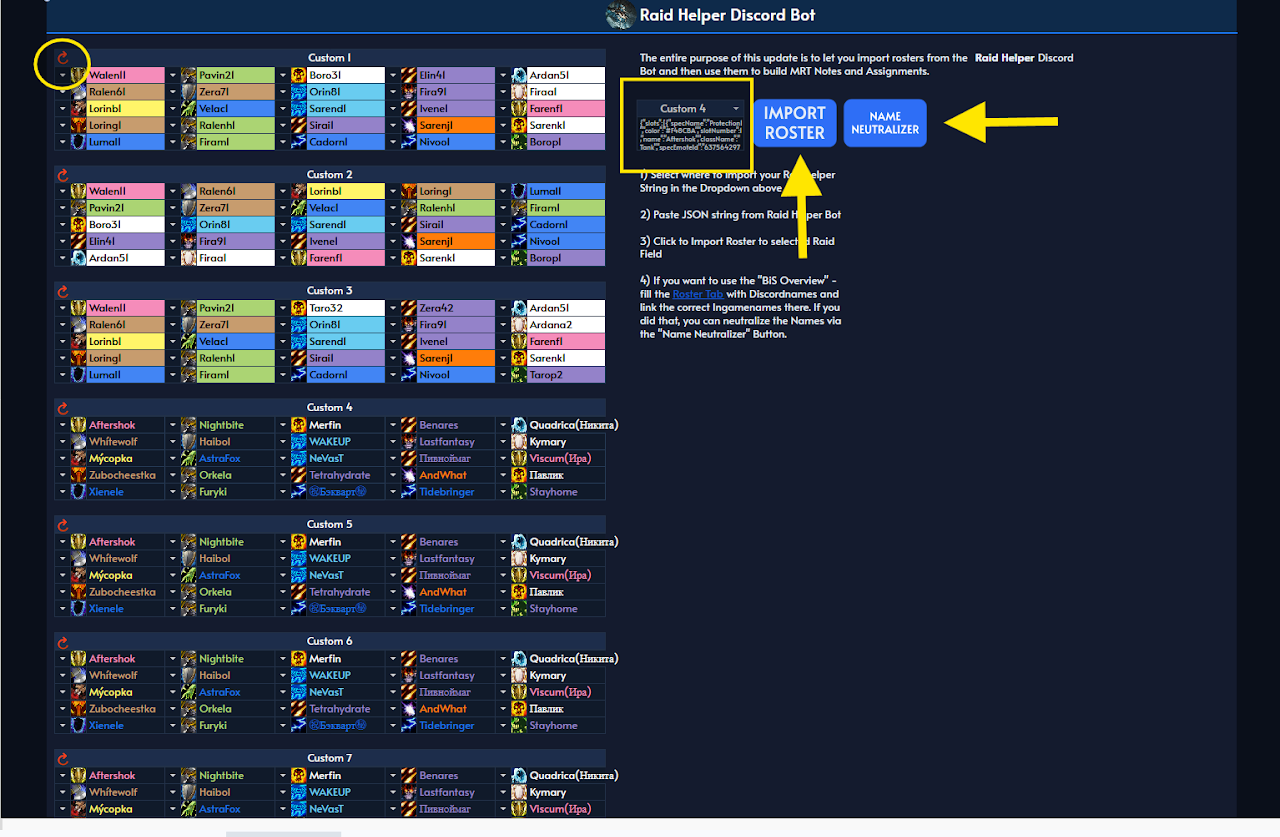
2a. Get the Raid Helper Bot String
Open the Discord signup or calendar entry, click the Comp link, make sure groups 1 through 5 are filled, then use the export option and copy the JSON string. Paste that string into the Raid Helper Bot tab.
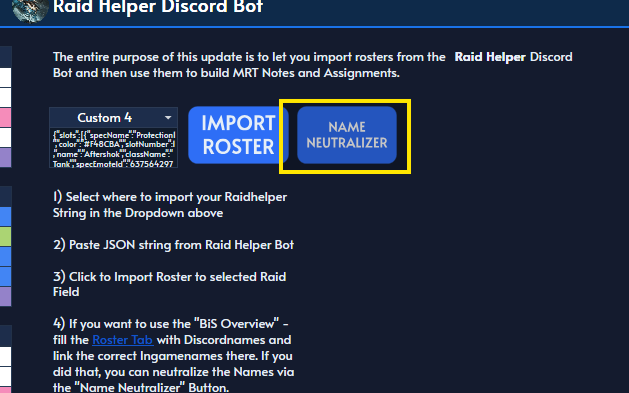

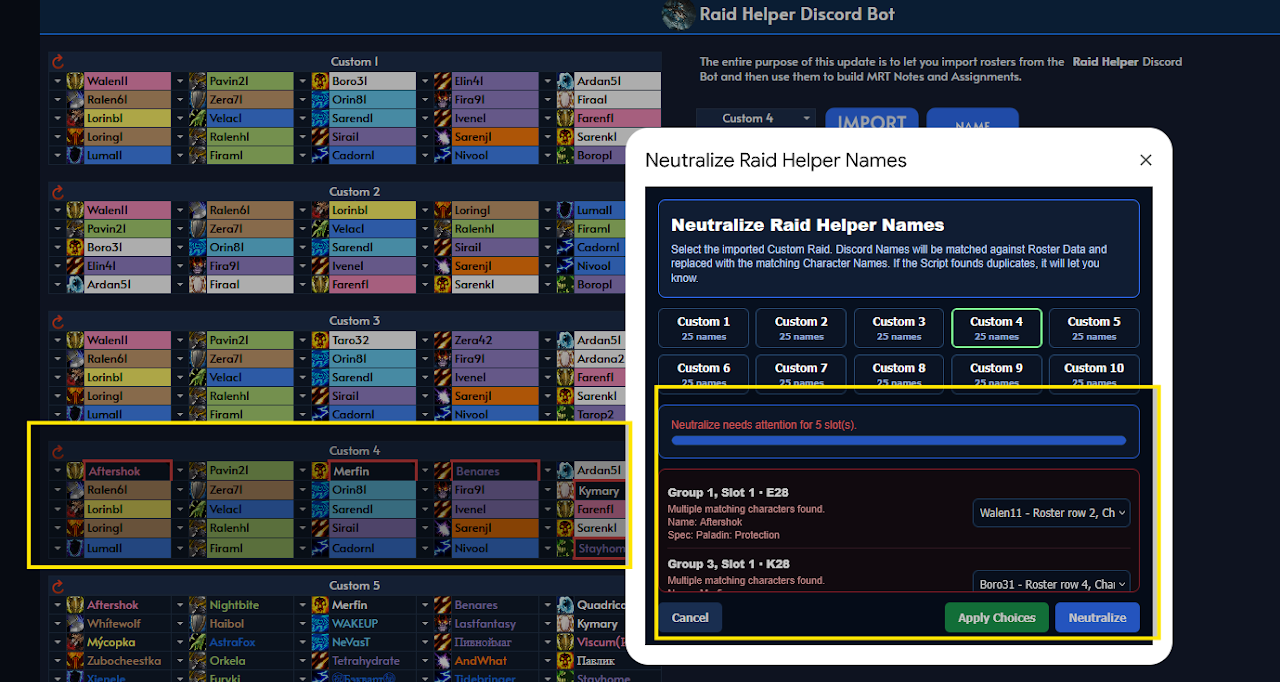
3. Neutralize Raider Names
The Name Neutralizer compares Raid Helper import names with the Discord names stored in your Roster tab and rewrites them to the correct in-game names. This is required when using BiS Management together with automatic Raid Helper imports.


If a player has multiple characters with the same class and specialization, the sheet asks which in-game name should be applied. Manual Raid Builder compositions do not need this step because they already use in-game names directly.
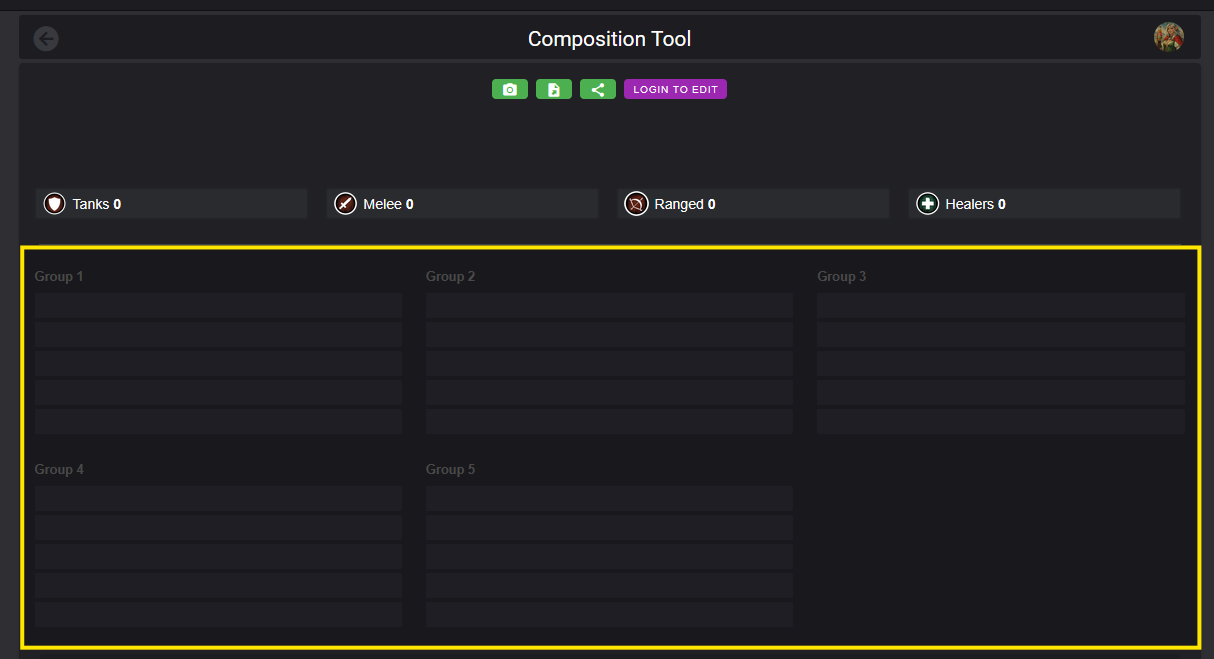
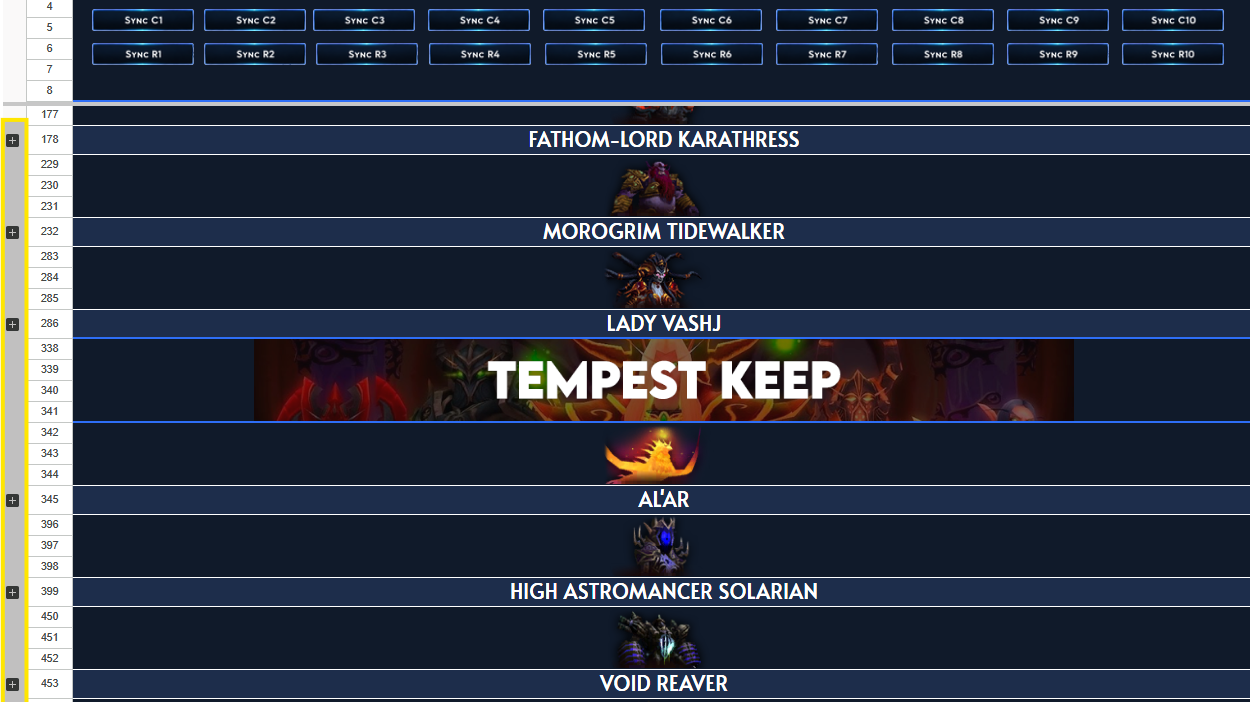
4. Use the BiS Overview Tab
After roster and raid composition setup, go to the BiS Overview tab and click the matching sync button. Sync C1 to C10 is used for custom Raid Helper imports, while Sync R1 to R10 is used for manual raids.
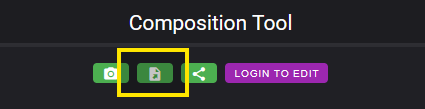
5. Assign Loot and Undo Mistakes
Open the BiS List Manager from the top left. After syncing a raid, each player row has checkboxes beside needed items. Checking an item awards it, removes it from the live overview, and records it in the player table.
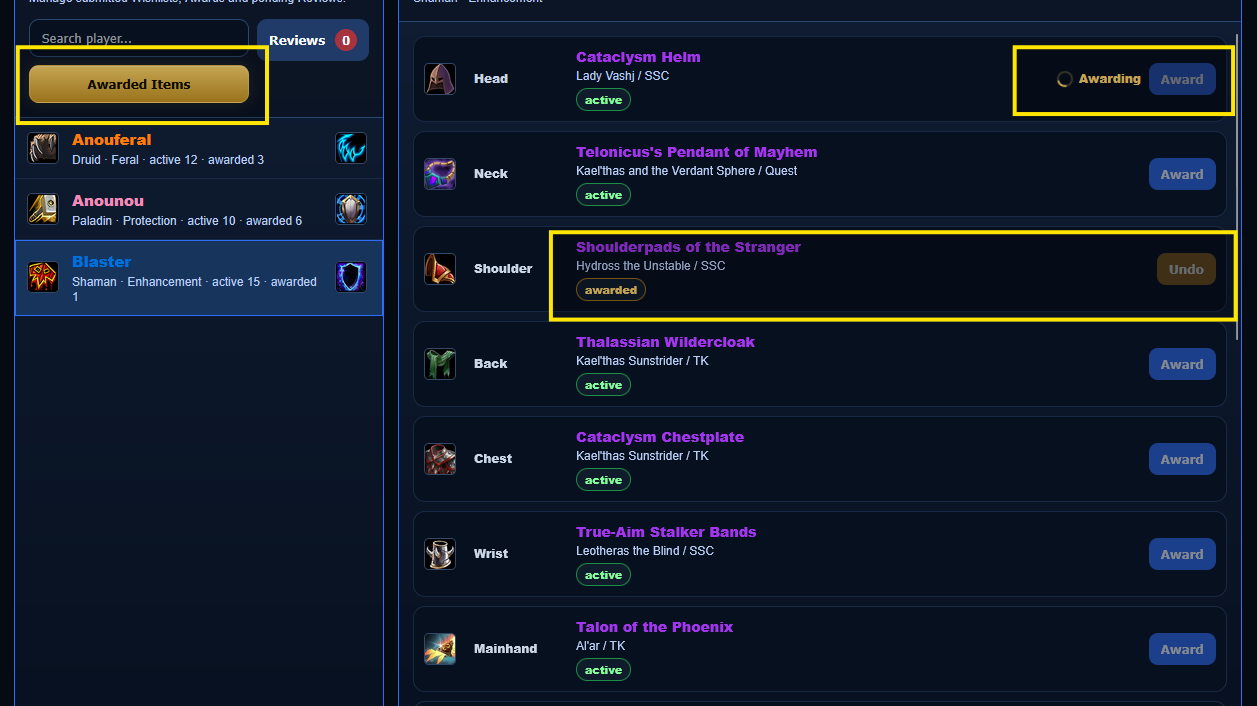
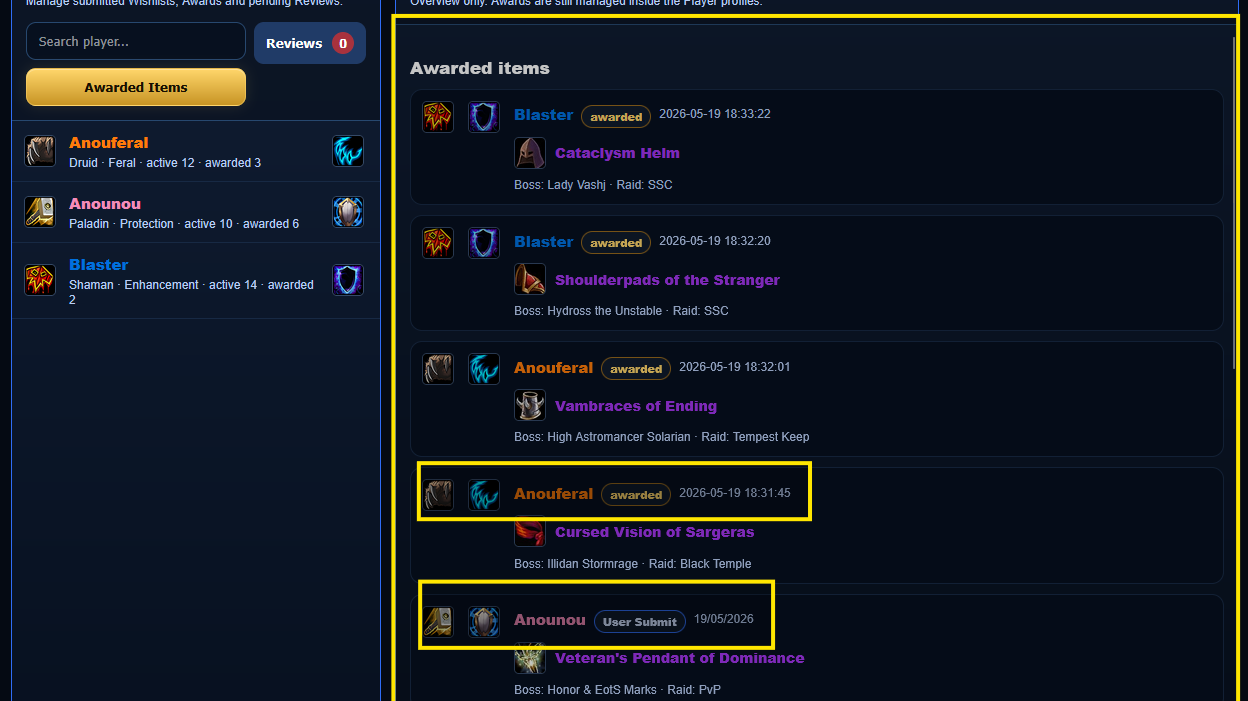
If loot was assigned to the wrong player, search the player in the manager and use Undo for the item. The Awarded Items view shows the full loot history.

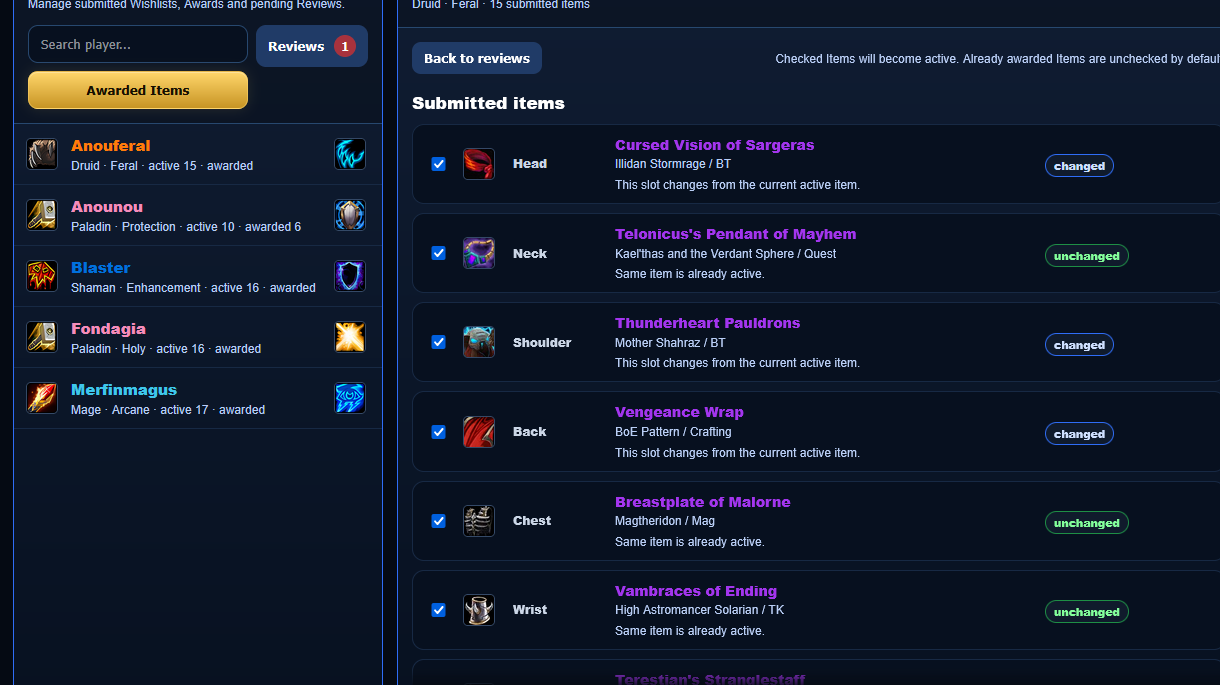
6. Review New BiS Lists
Players can submit changed lists. New submissions appear in Reviews and are only applied after a raid or guild leader approves them. The red number beside Reviews shows how many lists are waiting.

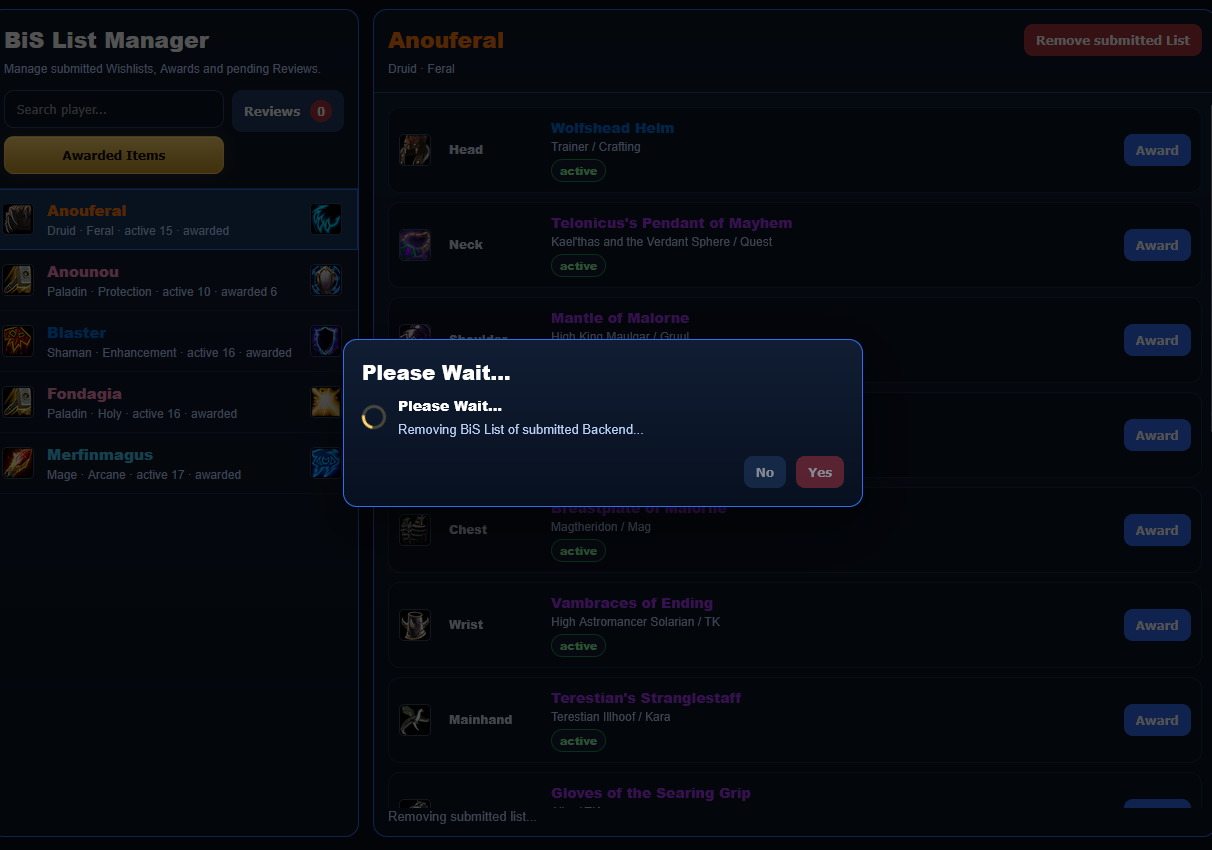
7. Remove Player Wishlists
Select the player in the manager and use Remove Submitted List. Confirming the popup deletes only the submitted BiS list. If the player left the guild, remove them from the Roster tab separately.
Tips, Tricks and General Information
You can expand and collapse bosses in the overview to keep the live raid view cleaner. Use the plus or minus controls on the left side of each boss block.